Pages

Monday, September 12, 2011

Well Rounded

Why "Well Rounded" you ask?  A sculpture instructor of mine, Leesa Haapapuro, once described creativity as a well; If you constantly draw creative inspiration from your well without filling it back up, your creativity will run dry.  SO TRUE!  I'm not so sure there are many 100% absolutely original ideas out there.  I think that we all draw from life; things we see, hear, and experience.  Then, when something catches our eye we interpret it in our own way, and, BAM... creativity happens!

My favorite part of blog land is filling up my well by keeping up with other bloggers, mostly craft blogs.  Here is my short  list of blogs that are not to be missed... 


My old way of keeping track of fun ideas was to copy and paste an image into a Word document.  Then, I'd print them off or save them to my desktop. Both of these methods made for messy desktops.  My new way of saving and organizing pictures... Pinterest.  Check it out!

Saturday I'll be at Fall Fest in Fort Loramie with all sorts of goods.  If you are in the area you should stop by! Have a great week!


Friday, September 9, 2011

Freebie Friday, Teacher Style

Today's first freebie, and the only thing our garden successfully produced this year...
these beautiful peppers! YUM, except for the chili peppers, which have proven to be good for nothing!
Note to self: Next year, no chili peppers and no visiting critters such as sweet corn loving raccoons and whatever small animal loves tomatoes!

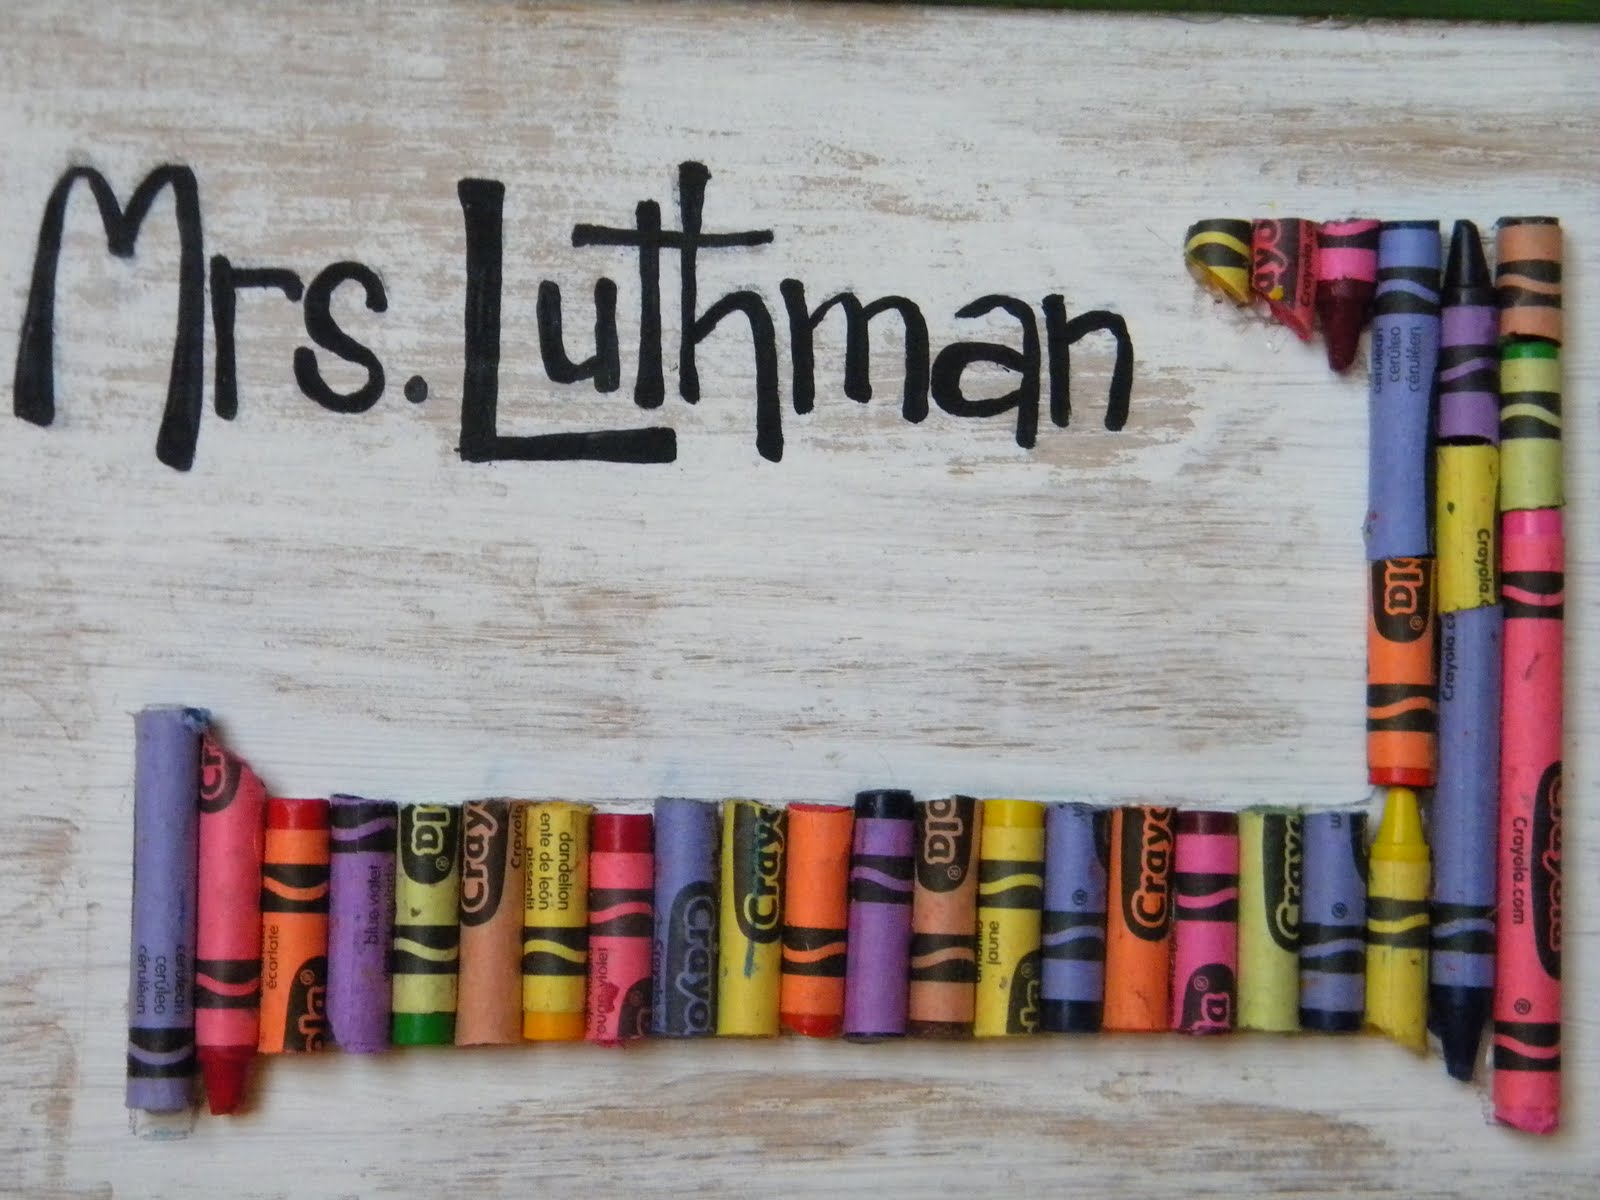
On to today's crafted freebie.  After much searching, my sister-in-law finally found a school that not only noticed her incredible teacher potential, but also had a spot for her on their payroll!  Congratulations Brooke! She is super excited about her new career but not nearly as enthusiastic about her "jail cell" looking classroom.  So, to help her brighten things up a bit, I concocted this...

Here's what you need...
1) a flat piece of something. I found a piece of wood that is about 6x8 inches.  
2)something to trim the finished piece with.  I used some old wood trim.
3)white, green, and black craft paint
4)hot glue
5)collection of old broken crayons

I started by painting the piece of wood white, letting it dry, and then sanding it a bit to give it a worn look.  Next, I drew the giant L and her name onto the white board.  Don't be fooled, I didn't freehand this.  I printed it off the computer, which also gave me a nice font selection, placed the paper onto the board and traced the letters, pressing very hard with a dull pencil. This left a light indent on the board which became super easy to follow.  Then, using a fine paint brush and black craft paint I painted in the letters of her name. 


Once the name had dried I began gluing on the crayons using a paring knife and a cutting board to make them the size I needed them.  Finally, I used the spare trim to make a frame around the edge.  This is really nothing fancy.  I used a miter box to cut the corners at 45 degree angles and hot glue to fix the frame together and to the finished board.  Paint the frame green and presto, you are finished!


I also make a better constructed, not-so-free, customizable version of this project upon request:)

Thanks for stopping by!  Have a great weekend!

Tuesday, September 6, 2011

One, Two, Buckle my shoe.... ALL BY MYSELF!

We just celebrated my Little Miss' second birthday!  I can't believe it has been two years since she stole my heart!  She is growing so fast and learning new things every second.  She has had a really big month.  We moved her up to her big girl room (which is in the middle of a makeover... pictures to come) and she adores it!  She is now the master of the potty which was a ridiculously process that still has me saying the most absurd things to help her understand normal body functions.  Above all, the biggest change in the last month has been her attitude.  She is Miss Independent!  "I can do it all by myself!" I keep trying to tell myself that when baby debuts I'll appreciate her "I don't need your help" attitude, but for the time being it is solely a test of my patients.   She has also become the kid who refuses to smile at a camera simply because she knows I want her to, so this is one of the very few photos from her birthday where she is smiling.


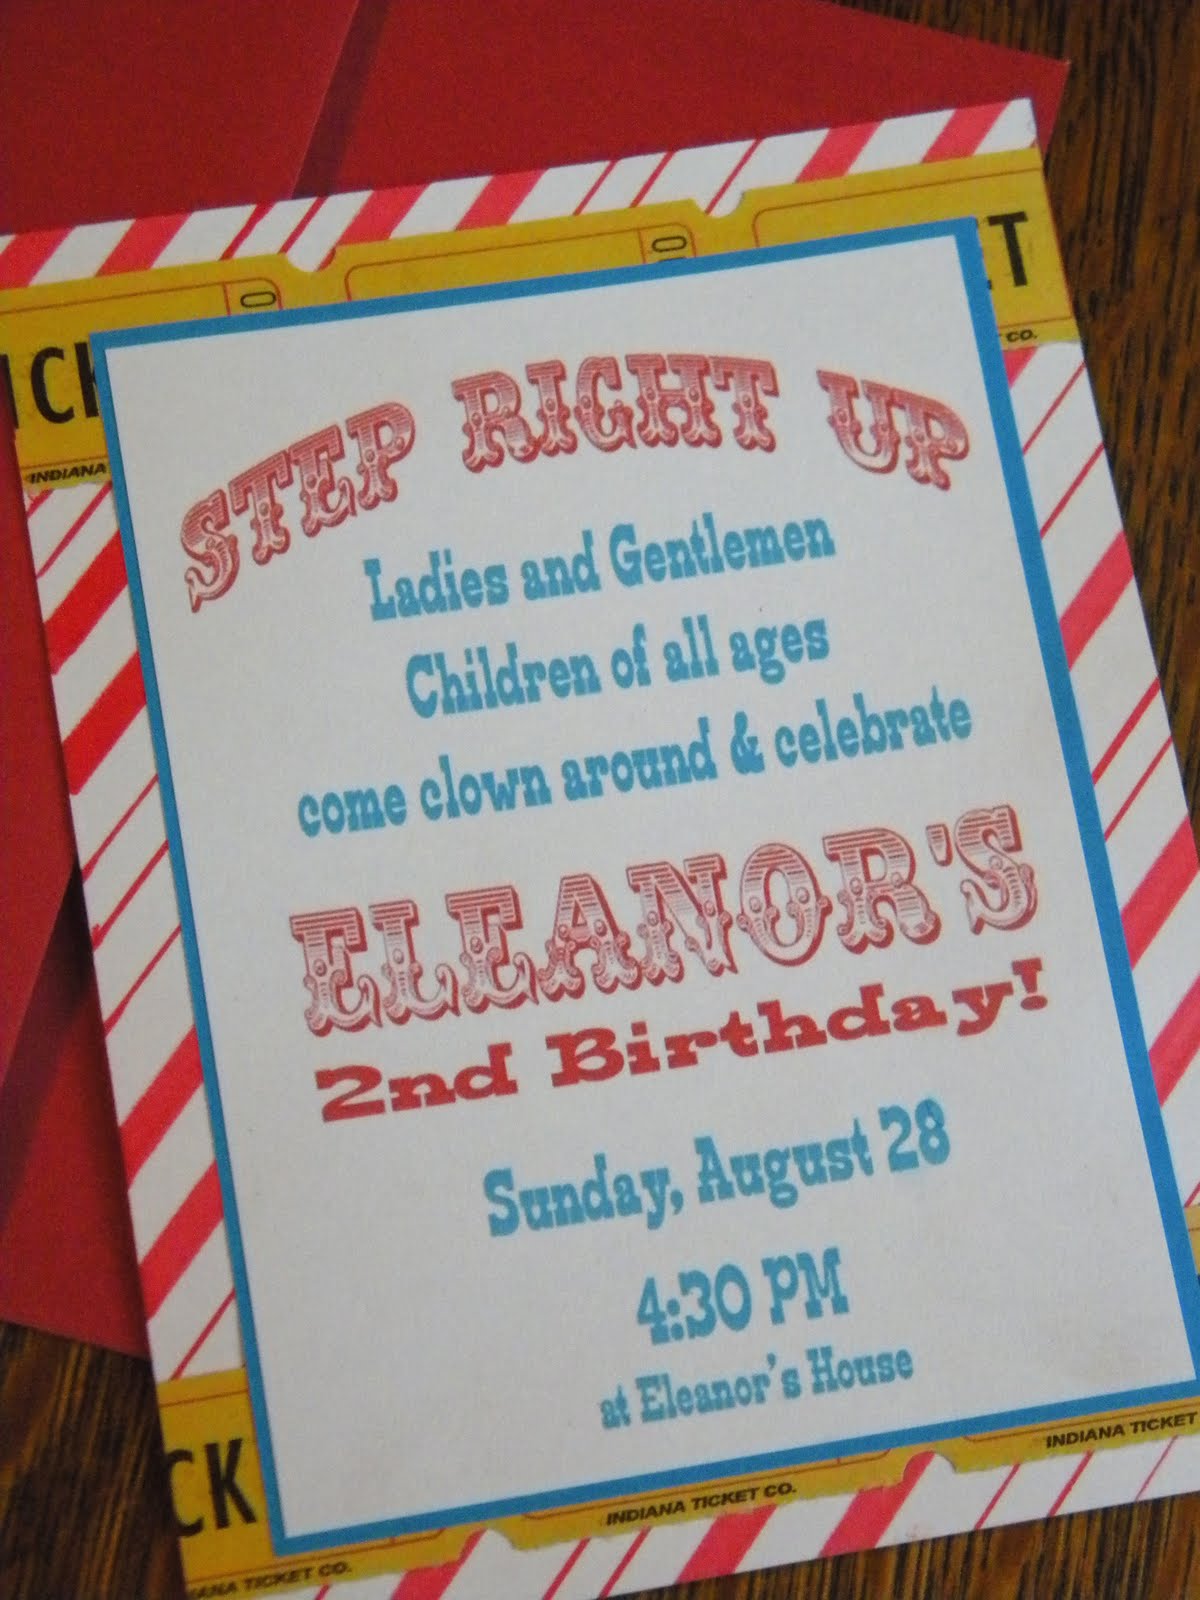
To celebrate her big day we had a party with a carnival theme.  I whipped up these invitations in Photoshop and pieced them together with some scrapbooking paper and genuine ticket stubs. 


 We served a nice light dinner and lots of snacks including peanuts, Barnum's Animal Crackers, gobs of colorful candy and lollipops, and popcorn.  


Centerpieces were simple mason jars filled with gumballs and a homemade pinwheel.  So simple!  Check it out...Here.  


"Aunt Brookie" made the cupcakes. (Check her out at Cakebiz.) 


They were delicious, just ask the Birthday Girl!


Instead of traditional birthday hats we had balloon hats and clown noses.  We were so blessed to be surrounded by our family.  They were all so generous and Little Miss loves all her new toys, books, and clothes, especially the big girls panties!


Thanks for stopping by!  I hope you had a relaxing Labor Day and have a good week to follow!


Friday, August 26, 2011

Freebie Friday

I've been waiting most of the summer to blog about my little picket fence.  I wanted to show you pictures of the finished product the way I had imagined it would look, with a beautiful bright pink rosebush in full bloom right in front of it.  Well, the good news is that I haven't killed the rosebush yet, but it hasn't quite lived up to what my imagination had hoped for.  None-the-less, the fence still turned out pretty darn cute, and best of all, it was FREE!

It started with a day spent at my parents' house.  Little Miss played with the kittens... 

and chased the chickens...

into the barn, where we stumbled across these old palettes that nearly blinded me with potential.  Aren't they beautiful?

First, I tore them apart, removing all the old nails.

Then, I spent some time cutting and measuring and re-cutting and re-measuring.  Next, I banged in a few nails and TaDa!


Add a little primer and a lot of paint to finish it off.  My hubby drove an old fence post into the center of the flower bed and secured the center piece of the fence to the post using and old wire clothes hanger. Perfect for the big empty hole in the center of my flower bed.   Now if only my rosebush would consider getting pretty before winter.

Thanks for stopping by!  Have a great weekend!


Monday, August 15, 2011

For the Birds

Baby is now 32 weeks old and is having all too frequent play dates with Braxton, braxton hicks that is.  At least I'm hoping that the awful contraction-like pains that kept me from sleeping last night are only false labor.  I'm not ready for baby to make his or her debut yet.  Whatever it is, its for the birds!

The feature bird of this post is the peacock.  In early July, my brother Caleb said his I do's to his better half, Brooke.  Brooke has an eye for style and wanted their wedding to include lots of peacock feathers. 

 I'm super ashamed that I didn't do a better job of photographing all the work I did for the wedding on their wedding day, so I recreated some of the centerpieces in the backyard.


I loved the weedy natural look of the flowers she chose.  Instead of fancy ribbon she picked string, just plain brown string.  It couldn't have been more charming!

Half of the tables had flower arrangements and the other half had these great candlesticks.  We wrapped them with the same brown string and they fit right in with the decor.  


Lots of candlelight helped to made the casual feel of the weeds, feathers and string very romantic. 


The reception was held  in a beautiful red barn which helped give the whole wedding a very country vintage feel.  


My favorite part may have been seeing their flower girl, my Little Miss, prance down the aisle.  She decided she didn't need her flowers to look good. 

Beautiful couple, huh??  I'm bound to get some super gorgeous nieces and nephews!
And, look at that bouquet!
Congratulations guys!